A Step-by-Step Look at Installing a Subsurface Drip Irrigation System
A Step-by-Step Look at Installing a Subsurface Drip Irrigation System
Watering your crops efficiently can make or break your agricultural operation. Traditional irrigation methods often waste water through evaporation and runoff, leading to higher costs and environmental concerns. Subsurface drip irrigation (SDI) offers a smarter solution by delivering water directly to plant roots below the soil surface.
This comprehensive guide walks you through everything you need to know about installing a subsurface drip irrigation system. Whether you’re managing a small farm or a large commercial operation, understanding the installation process will help you maximize water efficiency, improve crop yields, and reduce long-term maintenance costs.
By the end of this article, you’ll have a clear roadmap for implementing SDI on your property, from selecting the right components to troubleshooting common issues.
What is Subsurface Drip Irrigation?
Subsurface drip irrigation is a precision watering method that places drip lines beneath the soil surface, typically 4 to 12 inches deep. Unlike surface drip systems or sprinklers, SDI delivers water and nutrients directly to the root zone where plants need them most.
The system consists of buried drip tape or tubing with emitters spaced at regular intervals. These emitters release water slowly and consistently, creating an optimal moisture environment around plant roots. The result? Healthier plants, reduced water waste, and fewer problems with weeds and disease.
Farmers and growers have used SDI successfully for row crops, orchards, vineyards, and permanent plantings. The initial investment may be higher than surface irrigation methods, but the long-term benefits often justify the cost.
Benefits of Subsurface Drip Irrigation Systems
Water Conservation
SDI systems can reduce water usage by 30-50% compared to traditional irrigation methods. Since water is delivered directly to roots below the surface, losses from evaporation and wind drift are virtually eliminated. This efficiency becomes increasingly important as water resources become scarcer and more expensive.
Improved Crop Quality and Yield
Plants grow better when they receive consistent moisture at the root level. SDI maintains ideal soil moisture conditions throughout the growing season, reducing plant stress and promoting steady growth. Many growers report yield increases of 10-30% after switching to subsurface drip irrigation.
Reduced Weed Growth
Surface moisture encourages weed germination. By keeping the soil surface dry while maintaining subsurface moisture, SDI systems significantly reduce weed pressure. This means less competition for nutrients and reduced herbicide costs.
Enhanced Nutrient Management
SDI systems excel at fertigation—the application of fertilizers through the irrigation system. Nutrients can be delivered directly to the active root zone in precise amounts, improving uptake efficiency and reducing fertilizer waste.
Longer Equipment Life
Protected from UV exposure, mechanical damage, and environmental wear, buried drip lines typically last 10-15 years or more with proper maintenance. Surface systems, by contrast, often require replacement every 3-5 years.
Choosing the Right Components
Before breaking ground, you need to select appropriate components for your specific application.
Drip Tape or Tubing
Drip tape is thin-walled and more affordable, making it suitable for annual crops that require seasonal installation. Drip tubing has thicker walls and greater durability, ideal for permanent installations like orchards and vineyards.
Consider these factors when choosing:
- Wall thickness: Thicker walls resist punctures and last longer but cost more
- Emitter spacing: Match spacing to your crop’s root spread (typically 12-24 inches for row crops)
- Flow rate: Select emitters with flow rates appropriate for your soil type and crop needs
- Pressure compensation: Pressure-compensating emitters maintain consistent flow across varying terrain
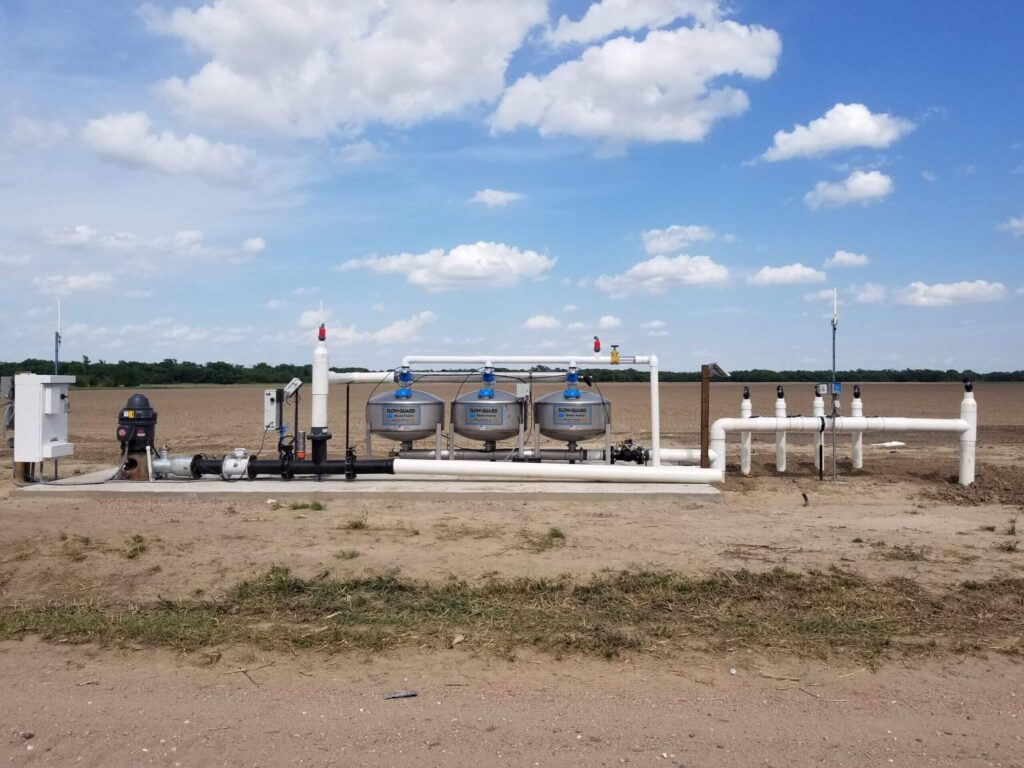
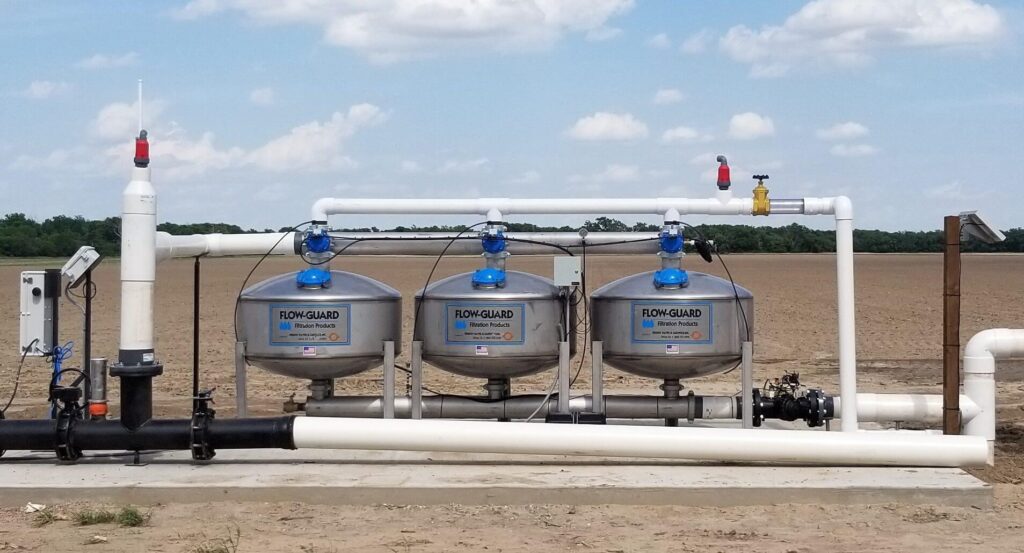
Filtration System
Clean water is essential for SDI systems. Drip emitters have small openings that clog easily if water contains sediment, algae, or other particles. Your filtration needs depend on your water source:
- Sand filters work well for well water with high sediment loads
- Screen filters handle lower sediment levels and organic matter
- Disk filters offer excellent filtration in a compact design
Many installations benefit from a two-stage filtration system combining different filter types.
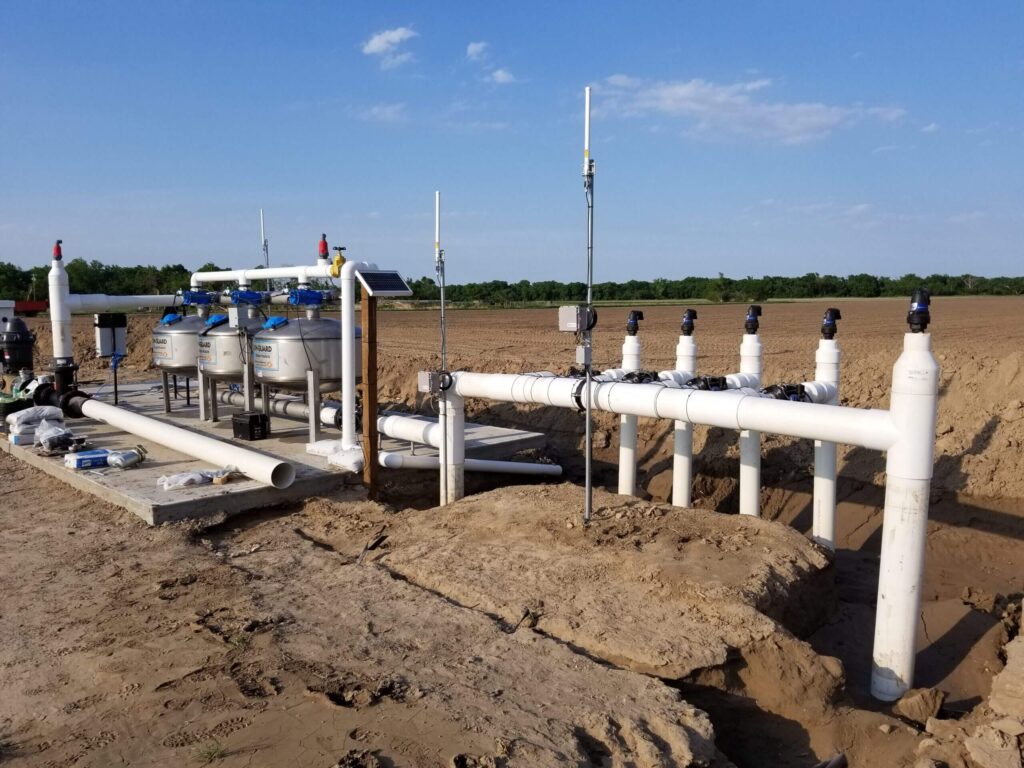
Pressure Regulators and Valves
Subsurface drip systems operate at low pressures, typically 8-15 PSI. Pressure regulators ensure consistent pressure throughout the system, preventing emitter damage and uneven water distribution.
Zone valves allow you to control different areas independently, accommodating varying crop needs or soil types. Automated valves connected to controllers enable precise irrigation scheduling.
Backflow Prevention
Protect your water source from contamination with an appropriate backflow prevention device. Local regulations often dictate which type you must install.
Step-by-Step Installation Process
Design and Planning
Start with a detailed site assessment. Map out your irrigation zones, noting:
- Field dimensions and topography
- Soil types and drainage patterns
- Water source location and available pressure
- Crop types and row spacing
- Access points for maintenance
Calculate your system’s water requirements based on crop evapotranspiration rates, then design zones that balance flow capacity with coverage needs. Professional subsurface irrigation design software or consultation with irrigation specialists can help optimize your layout.
Prepare the Site
Clear the installation area of rocks, debris, and crop residue. Grade the field if necessary to improve drainage and prevent water pooling. Mark underground utilities to avoid accidental damage during trenching.
If you’re installing in an existing field, complete this work during the off-season when the ground isn’t planted.
Install the Main Line and Headers
Begin by laying the main water line from your source to the field. This line should be sized to handle the total system flow without excessive pressure loss.
Install header lines at the end of each zone. Headers distribute water to individual drip lines and should run perpendicular to your crop rows. Bury main lines and headers deep enough to protect them from tillage equipment—typically 18-24 inches.
Lay Out Drip Lines
Position drip lines according to your design, spacing them to match your crop rows. For row crops, place lines 2-4 inches to the side of where plants will grow, at a depth of 6-12 inches depending on soil type and crop.
Sandy soils require shallower placement (4-6 inches) to keep water in the root zone. Clay soils can accommodate deeper installation (8-12 inches) and benefit from the improved aeration that depth provides.
Connect the System
Attach drip lines to header lines using appropriate fittings. Ensure all connections are secure and properly sealed. Install flush valves at the end of each drip line zone to enable periodic flushing of accumulated sediment.
Install Filters and Controls
Mount your filtration system between the water source and the main line. Install pressure regulators and zone valves according to your design. If using an automated controller, wire valves and sensors according to the manufacturer’s instructions.
Pressure Test and Flush
Before burying any components, pressurize the entire system and check for leaks. Open flush valves and run water through each zone to clear any debris introduced during installation. Repair any leaks and verify that all emitters are functioning properly.
Final Burial and Covering
Once you’ve confirmed the system operates correctly, carefully bury all lines to their final depth. Avoid sharp turns or kinks that could restrict flow. Mark the locations of valves, flush points, and other access points for future reference.
Maintenance Tips for Long-Term Performance
Regular maintenance keeps your subsurface drip irrigation SDI system running efficiently for years.
Routine Flushing
Flush your system at least monthly during the growing season. Open end-line flush valves and run water until it flows clear. This removes sediment that accumulates in drip lines and prevents emitter clogging.
Filter Cleaning
Check filters weekly during peak use. Clean or replace filter elements when pressure differential exceeds manufacturer recommendations—typically when inlet pressure exceeds outlet pressure by 5-10 PSI.
Chemical Treatment
Treat your system periodically with chlorine or acid to prevent biological growth and mineral deposits. Chlorine controls algae and bacteria, while acid dissolves calcium and other mineral buildups. Follow recommended injection rates and safety procedures.
End-of-Season Winterization
In cold climates, properly winterize your system before freezing weather arrives. Drain all water from lines, blow out remaining moisture with compressed air, and protect above-ground components from freeze damage.
Annual Inspection
Each season, pressure test your system before regular use begins. Walk the field during operation, watching for wet spots that indicate leaks or emitter problems. Address issues promptly to prevent crop damage and water waste.
Troubleshooting Common Issues
Uneven Water Distribution
- Symptoms: Some areas receive too much water while others remain dry.
- Causes: Pressure variations, clogged emitters, damaged lines, or inadequate filtration.
- Solutions: Check pressure throughout the system, verify filter operation, flush individual zones, and inspect lines for damage. Consider adding pressure-compensating emitters if pressure variation is unavoidable.
Emitter Clogging
- Symptoms: Reduced flow, dry spots, plant stress in specific areas.
- Causes: Inadequate filtration, biological growth, mineral precipitation, or root intrusion.
- Solutions: Improve filtration, increase flushing frequency, implement chemical treatment programs, and consider using root-resistant drip tape for permanent installations.
Rodent Damage
- Symptoms: Leaks, wet spots, or complete loss of pressure in affected zones.
- Causes: Gophers, ground squirrels, or other rodents chewing through buried lines.
- Solutions: Install lines at greater depth where feasible, use rodent-resistant tubing products, implement rodent control programs, and promptly repair damaged sections.
Vacuum Formation
- Symptoms: Collapsed drip tape, sediment ingestion through emitters, or erratic system behavior.
- Causes: System draining too quickly when shut off, creating negative pressure.
- Solutions: Install vacuum relief valves, avoid sudden shutoff of pumps, use check valves appropriately, and ensure proper system design prevents rapid drainage.
Partnering with Western Irrigation
Installing SDI represents a significant investment in your operation’s future. Working with experienced professionals ensures your system is designed correctly and performs reliably for years to come.
Western Irrigation specializes in agricultural irrigation solutions, offering comprehensive design, installation, and support services. Their team can help you:
- Assess your site and determine if SDI is the right choice
- Design a system optimized for your crops and conditions
- Source quality components suited to your specific needs
- Provide installation services or technical guidance for DIY installations
- Troubleshoot issues and optimize system performance
With expertise across various irrigation technologies and crop types, Western Irrigation brings valuable insights to every project. Their commitment to water conservation and sustainable agriculture aligns with the environmental and economic benefits that subsurface drip irrigation provides.
Making the Move to Subsurface Drip Irrigation
Subsurface drip irrigation offers significant advantages for modern agriculture, delivering water savings, improved crop performance, and reduced maintenance for a strong, long-term ROI. While installation demands careful planning, professional consultation is key to avoiding costly mistakes and optimizing your system. Evaluate your specific needs, calculate potential savings, and plan your timeline. Proper installation and maintenance will lead to healthier crops, lower water bills, and efficient irrigation for years to come.